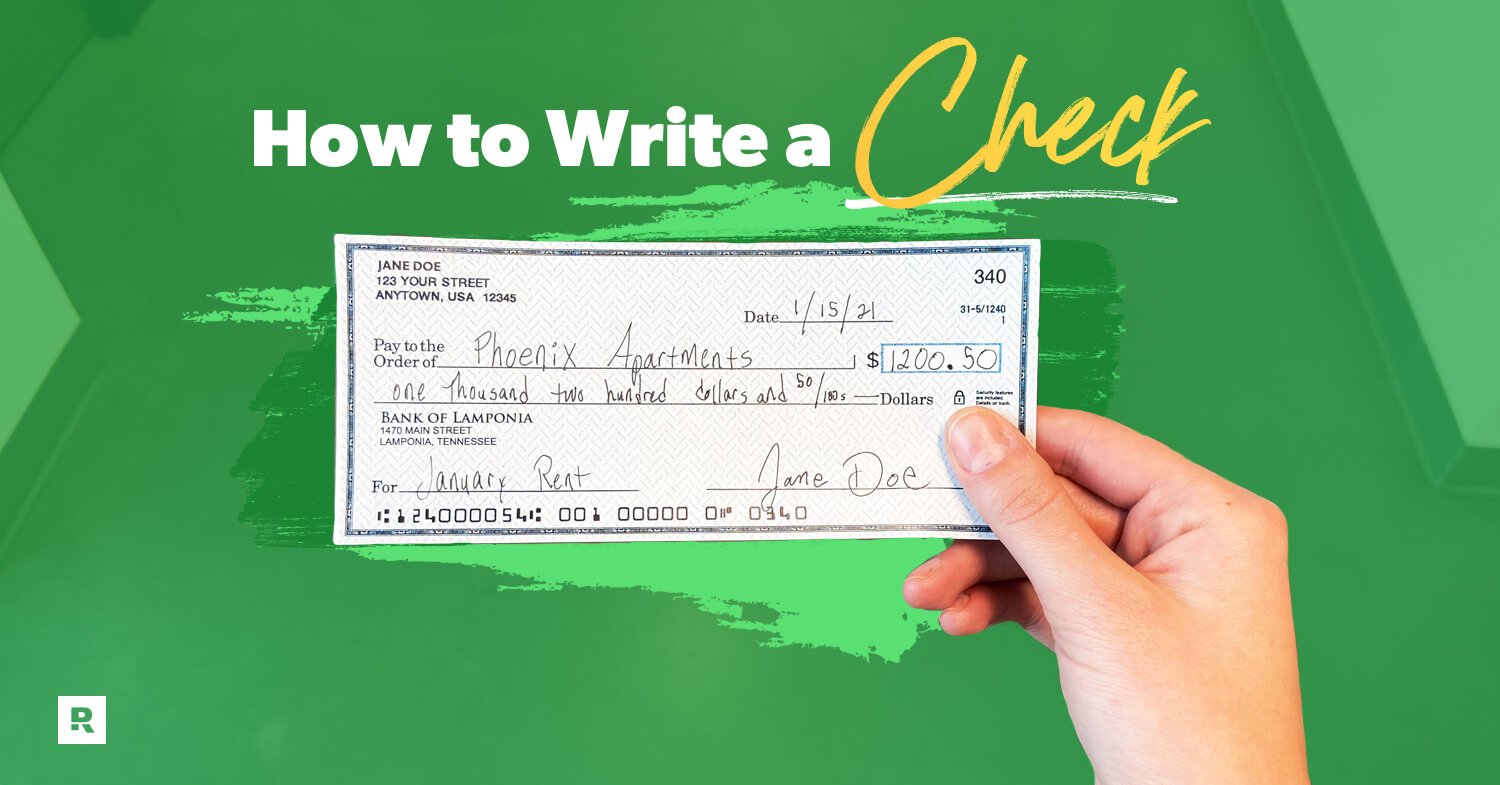
How to Write a Check

In a world of online payments and auto-drafts, checks may seem a little out of date. But believe it or not, there are still places that require checks or charge a fee if you pay with anything other than cash or check. And if your high school was too focused on the Pythagorean theorem to teach you personal finance, it’s possible you never learned how to write a check.
Hey. No shame there. Let’s talk everything you need to know about checks, beginning with the six steps of how to write a check:
How to Write a Check in Six Steps

Step One
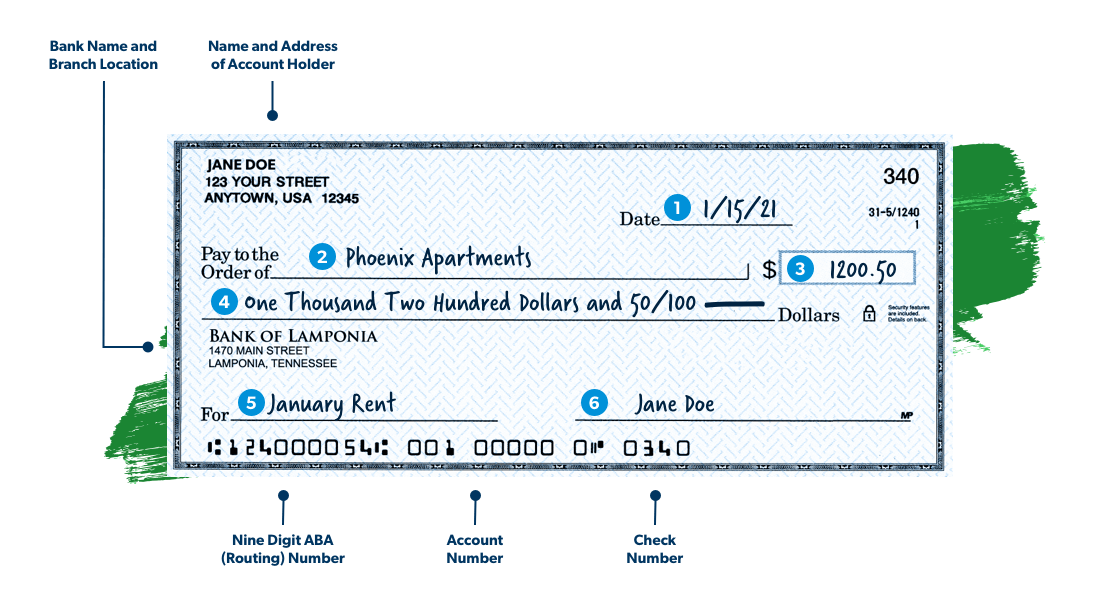
Date: Fill in the day, month and year.
Step Two
Pay to the Order of: Write the name of the person or business you’re paying.
Step Three
Amount Box: Write the amount you’re paying—in numbers.
If you accidentally write the wrong numbers (it happens!), you can draw a line through it, correct it, and then initial by the correction.
Step Four
Amount Line: Write the amount you’re paying—in words this time. (Yeah, it can feel repetitive. But it adds extra security when you’re 100% clear how much money you’re talking about.)
Step Five
Memo: Sometimes this line says “For” instead of “Memo.” It’s where you explain what the check is paying for, like “water bill for May” or “dance lessons for June.”
If you have an account tied to the bill you’re paying (like electric or medical bills), include the account number in the Memo line. This is another way to give even more clarity.
Step Six
Signature: Now it’s time to make things official. Remember when you wanted to be a famous baseball player or movie star? You can pretend you’re signing an autograph here to make paying your bills more fun.
Just make sure the name you sign matches the account holder name at the top of the check (above your address). So, if you go by your middle name, but your first name is printed on the check, sign with your first name!
After You Fill Out a Check
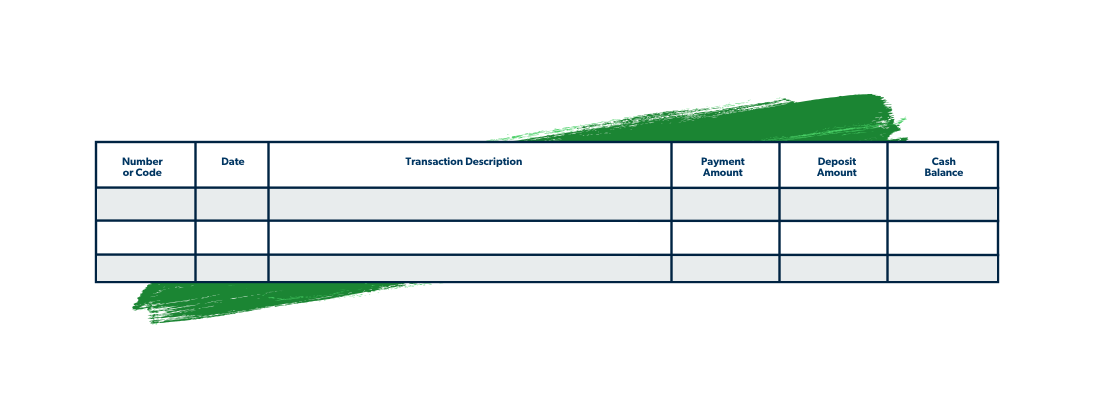
After you fill out the check, make sure you write it down in the checkbook register. This is a little notebook-like thing with a bunch of columns and rows. It comes with the checkbook and helps you keep up with your spending.
In fact, that checkbook register is the place you write down all your expenses and income—not just checks! If you use your debit card or go to the ATM (to deposit or withdraw money), you need to write it in here.

Your checkbook register has rows for these things:
-
Number or Code: Write the check number here. If the transaction wasn’t a check, make yourself a code like DC for debit card, T for transferring money from one account to another, D for deposit, or ATM. Because let’s be honest: You won’t remember those details when you look back to balance your checkbook later. Help your future self out!
-
Date: Put in the day, month and year the transaction happened.
-
Transaction Description: Again, help out future you. Put the name of the person or business, and also a quick note like “haircut” or “book club snacks” to help you remember where the heck that money went to or came from.
-
Payment Amount: If you’re making a purchase or paying a bill, write how much here.
-
Deposit Amount: If the transaction is money coming in, write how much here.
-
Balance: Sorry, but it’s math time! Subtract the expense or add the deposit so you know your current balance—because that’s one key way to avoid overdraft fees!
Security Tips for Writing a Check
Any time you’re dealing with money and your identity, it’s important to be super secure. And since checks involve both of those things, here are a few security tips for writing a check:
Use a pen. If you write a check in pencil, someone can erase it and change the amount or replace the name in the Pay to the Order of line. Nope. Nope. Nope.
Fill the entire amount box and amount line. Don’t leave blank space in the amount box or amount line. That opens the door for someone to change a period into a comma—making you pay more than you signed up for (literally). Write the numbers big enough to fill the box and the words big enough to fill the whole line—or add a line to fill up any extra space, like in our sample check example!
Don’t sign the check until it’s filled out. No blank checks in your checkbook or wallet, okay? Let that signature be the last thing you fill out when you’re writing a check.
Don’t practice signature styles. Do that before you’re writing checks, not while you’re writing checks. You don’t want banks questioning fraud because your signature doesn’t look the same. And you don’t want to make it easy for someone to sign your name looking like whatever because you never make it look the same!
How to Endorse a Check
While we’re talking about checks, we want to cover one more topic: endorsing a check. Okay, what the heck does endorsing a check mean anyway? It’s when you sign a check that’s been written to you so you can cash it or deposit it. Here’s some important things to note:
So, the way you endorse a check depends on what you want to do with the check. If you want to cash the check so you can have the money in hand, just sign it in the box on the back that says “Endorse Here.”
If you want to deposit the money into your bank account—either at the ATM, to a bank teller, or as a mobile deposit—write “For deposit to account” and your account number. Then sign. And remember, all that needs to fit inside the signing area.
One callout here: If you’re doing a mobile deposit, your bank might have some specific guidelines. So, check out those before you sign.
Keeping Up With Income and Expenses
Okay, so that was a lot. And let’s be honest—if you’re using your checkbook register to log in all income and expenses, can we suggest a better and easier way?
A budgeting app.
Specifically, you need a budgeting app that connects to your bank, so transactions stream right in to your budget. Then instead of filling out five rows every time you spend or make money, you can just drag and drop the transaction to the right budget line.


